Homepage Editor
- Basic functions
- text design
- text alignment
- Web specific features
- Create link - connect pages
- External links – link to another website
- Image management – upload images
- The image menu bar
- The image editor
- Example - edit image online
- Document management – upload document
- Upload a PDF file
- Upload a ZIP file, make it available for download
- Tables - Table menu bar
- Insert table
- Position invisible table, borderless table, transparent table, image and text side by side
The homepage editor (HTML editor or also known as Wyswy editor) simplifies the editing of web pages. No programming knowledge is required for operation.
Basic functions
Some of the icons in the menu bars are described below.
 Open page starts file management
 save page
 Save Page As, saves the page under a different name
 restart page
 cut out
 Copy
Copy
 Insert
 Undo, undo the last action performed
 Redo, undo last undo
Cut, copy and paste example
To copy objects such as text, images or tables, select the text or image and click on it Copy Symbol. Now click on the place where the text should be inserted and on the Insert button.
text design
The following functions can be applied to texts. To do this, mark the corresponding text and click on one of the symbols.
 bold
bold
 italics
 underlined
 Superscript
 subscript
 text color
 Text Background Color
 Remove Text Formatting removes all formatting
 font
font
 Font size, with input field for manual input of the font size
text alignment
 left-justified text alignment
  centered text alignment
  right text alignment
  justification
  Remove text alignment
  Numbering - Automatic numbering of paragraphs, in combination with "Paragraph
indent” sub-items can be implemented  List of points - analogous to the numbering, only stylistically with points instead of numbers
  indent paragraph
  Indent paragraph less
Web specific features
 Page Settings
 template
 menu settings
 release object
 HTML code view
 Search - finds terms on the page as well as in Code View.
  remove link
  Own pictures - image management
  Documents - document management
  Table menu bar - Enable as well as disable the menu bar
  FTP Directories - Access to the FTP directory
  Insert Separator - Text Design
  insert form - create forms
  Special Objects - Ticker, counter, date, slide show, mouseover - image
  Insert button - create buttons
  special character
Create link - connect pages
A so-called link is a reference to another page. A link can be text or an image. To do this, mark the desired text or an image in the editor and click on  insert link .
In the link window, click  choose side .
In this example, a link to the Contact.html page is to be created. In the file manager, click on the page Contact.html and confirm with Take over .
Confirm with in the link window Insert . Save the pages, close the editor and test the link.
External links – link to another website
External links are references that connect to another website. To do this, mark the desired text or an image in the editor and click on insert link . Now enter the so-called URL of the website in the "Link" field, for example https://www.bluetronix.de , a. If the website is to be opened in a new browser window, select under Target New window .
Confirm with in the link window Insert . Save the pages, close the editor and test the link.
Image management – upload images
With the help of image management, you can transfer images from your local PC to your web storage space and insert them in the editor, for example.
Select picture directory  image editor, for edit the image online
  Clear image
  download image (download)
In the following example, an image is to be uploaded and then inserted in the editor.
Start image management by clicking on the button image management . click on Search , select an image file from your PC. click on Open and then up Upload Image .
To insert the picture, mark the picture with a click and press Insert Picture .
 An image file must have the extension jpg, jpe, jpeg, png or gif and must not be larger than 1 MB. To upload non-applicable files, use the FTP access .
The image menu bar
When you click on an image in the editor, the image menu bar is automatically displayed.

Here you can set the image size, the image title, the border color and the border width. The function Smooth automatically calculates the image to the entered image size. The function automobile crops the image to fit proportionally within the given image size.
In the following example, the image was transferred with a resolution of 640x480 pixels and a file size of 95 KB and inserted several times in the editor in different image sizes.

Image in size 250x188 pixels, with smoothing, and proportionality, file size 28 KB
|
|
|
|
Image in size 150x188 pixels, with anti-aliasing, and auto-crop, file size 18 KB |
Image in size 250x100 pixels, with anti-aliasing, and auto-crop, file size 17 KB |

An image can thus be used in different places in the editor in different resolutions. The images are automatically calculated in pixel size and resolution by the bluetronix software. A previous cropping of the images can be omitted.
If the image is replaced in the image management, all versions of this image will change automatically.
The image editor
With the image editor, you can easily edit images from the image management online without any additional software.
Open image, starts file management
save Image
Save picture as, saves the picture under a different name
Zoom factor selection field Undo, undo the last action performed
Redo, undo last undo  mirror vertically
  mirror horizontally
Contrast selection field
Brightness selection field  Crop image, crop to marquee
  Delete selection
Input field width in pixels
Height in pixels input field
Keep proportionality option when changing image dimensions  Crop image to input size
  Reset image, reset to initial state
Input field for rotation in degrees  Rotate clockwise
  Rotate counterclockwise
  Convert to negative image
  Convert to grayscale image
Example - edit image online
In the following example, an image is opened, cropped to a specific image section, mirrored and saved after adjusting the brightness and contrast.
|
original image |
Image after processing |


Start the image management , highlight an image and click Image editing . To crop the image, click with the left mouse button on the starting point for the image section. Hold down the mouse button and drag the frame to the end point for the image section. Click on the icon crop image . Click on the button to flip the image mirror horizontally .
In the next step, the brightness and the contrast are set. To do this, use the selection fields and set Contrast to +2 (increase by 2 values) and Brightness to -1 (decrease by one value). If the desired result was not achieved, click on Undone to undo the last action. Save the image with one click Save on computer .
Document management – upload document
With the help of document management, you can transfer documents such as PDF, DOC, XLS, ZIP and media files such as WAV, MP3, SWF, MOV etc. from your local PC to your web storage space and insert them in the editor, for example.
Depending on the format, the document is inserted in such a way that it is generally called up with the corresponding application. For example, a PDF is inserted in such a way that clicking on the file name opens it in the PDF program. Clicking on a ZIP file opens the download window (download window). For MOV and MP3, the player will open to play the movie or track.
Select document directory  Preview in new window Delete document Download document (download)
Upload a PDF file
In the following example, a PDF document is to be uploaded and then inserted in the editor.
Start the document management with a click on the button document management . click on Search , select a file from your PC and click Open and then up Upload file .
To insert the document, mark it with a click and press Insert File . Close the vault and save the page. If you now click on the file name on your homepage, the PDF will automatically open in the PDF program.
Upload a ZIP file, make it available for download
In the following example, a ZIP file is to be made available for download.
Start the document management with a click on the button document management . click on Search , select the ZIP file from your PC and click Open and then up Upload file .
To insert the file, mark it with a click and press Insert File . Close the vault and save the page.
To test the download, click on the file name of the ZIP file on your homepage and then in the "Save file" window Save on computer .
A document file must have the extension tiff, tif, fla, swf, wav, doc, wri, txt, xls, pdf, csv, zip, mpg, mov, mp3 or ppt and must not be larger than 10 when uploaded to the document management system be MB. If the file is larger, upload it using FTP. See Upload a file using FTP .
Tables - Table menu bar
When designing a website, tables have an important function for positioning elements.
Insert table
Click on the button in the editor  Insert table . To make the table stand out, make the settings for background color, border color and border width. Enter the number of columns and rows and confirm with Insert .
If you click in a table or on the edge of a table in the editor, the table menu bar is automatically displayed.

 Insert row - inserts a new table row below the selected row
 Delete line - removes the selected line
 Insert Column - inserts a new table column next to the selected column
 Delete Column - removes the selected row
 Total Table Width - formats the width of the table in pixels and percentage
 Table Total Height
 Cell Spacing - sets the space between the text and the border
 margin width
 Border Color - The color of the table border
 Table Background Color
 Cell background image - a background image can be set for each cell in the table
 Remove cell background image
 Cell background color - as for the entire table, a background color can also be selected for each table field
Cell Column Width - formats the width of the column in pixels and percentage
Row height of the cell
 vertical text alignment - the text within a table field can be aligned vertically
Position invisible table, borderless table, transparent table, image and text side by side
A borderless table can be used to align and position images and text. In the following example, two images, each with an image description, are to be positioned next to each other.
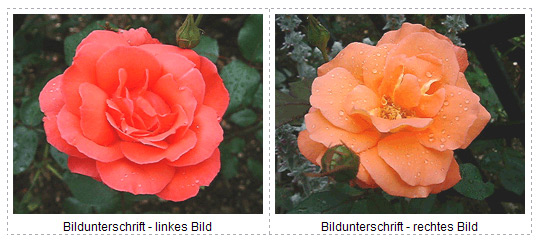
In the editor, click Insert table . Enter 2 for Number of Columns (for 2 images) and enter 1 for Number of Rows. Since the table is only used for positioning and should not be visible on the homepage, enter 0 for "Border width". Confirm with Insert . The table is displayed with a border width of 0 in the editor with dashed lines. After saving the page, these lines are no longer visible.
In the editor, click in the left table field and add from the image management a picture. Enter an image description below the image. Now click in the right table field and insert the 2nd image. Save the page and check the result on your homepage.